How to Zero a Scope (7 Easy Steps)
Have you ever aimed at a target, pulled the trigger, and found your shot way off the mark? It’s frustrating, right?
That’s where we come in.
Learning how to zero a scope can make a world of difference in hitting your target with precision, and that’s exactly what you’ll learn in this easy step-by-step guide!
What does “zeroing a scope” even mean?
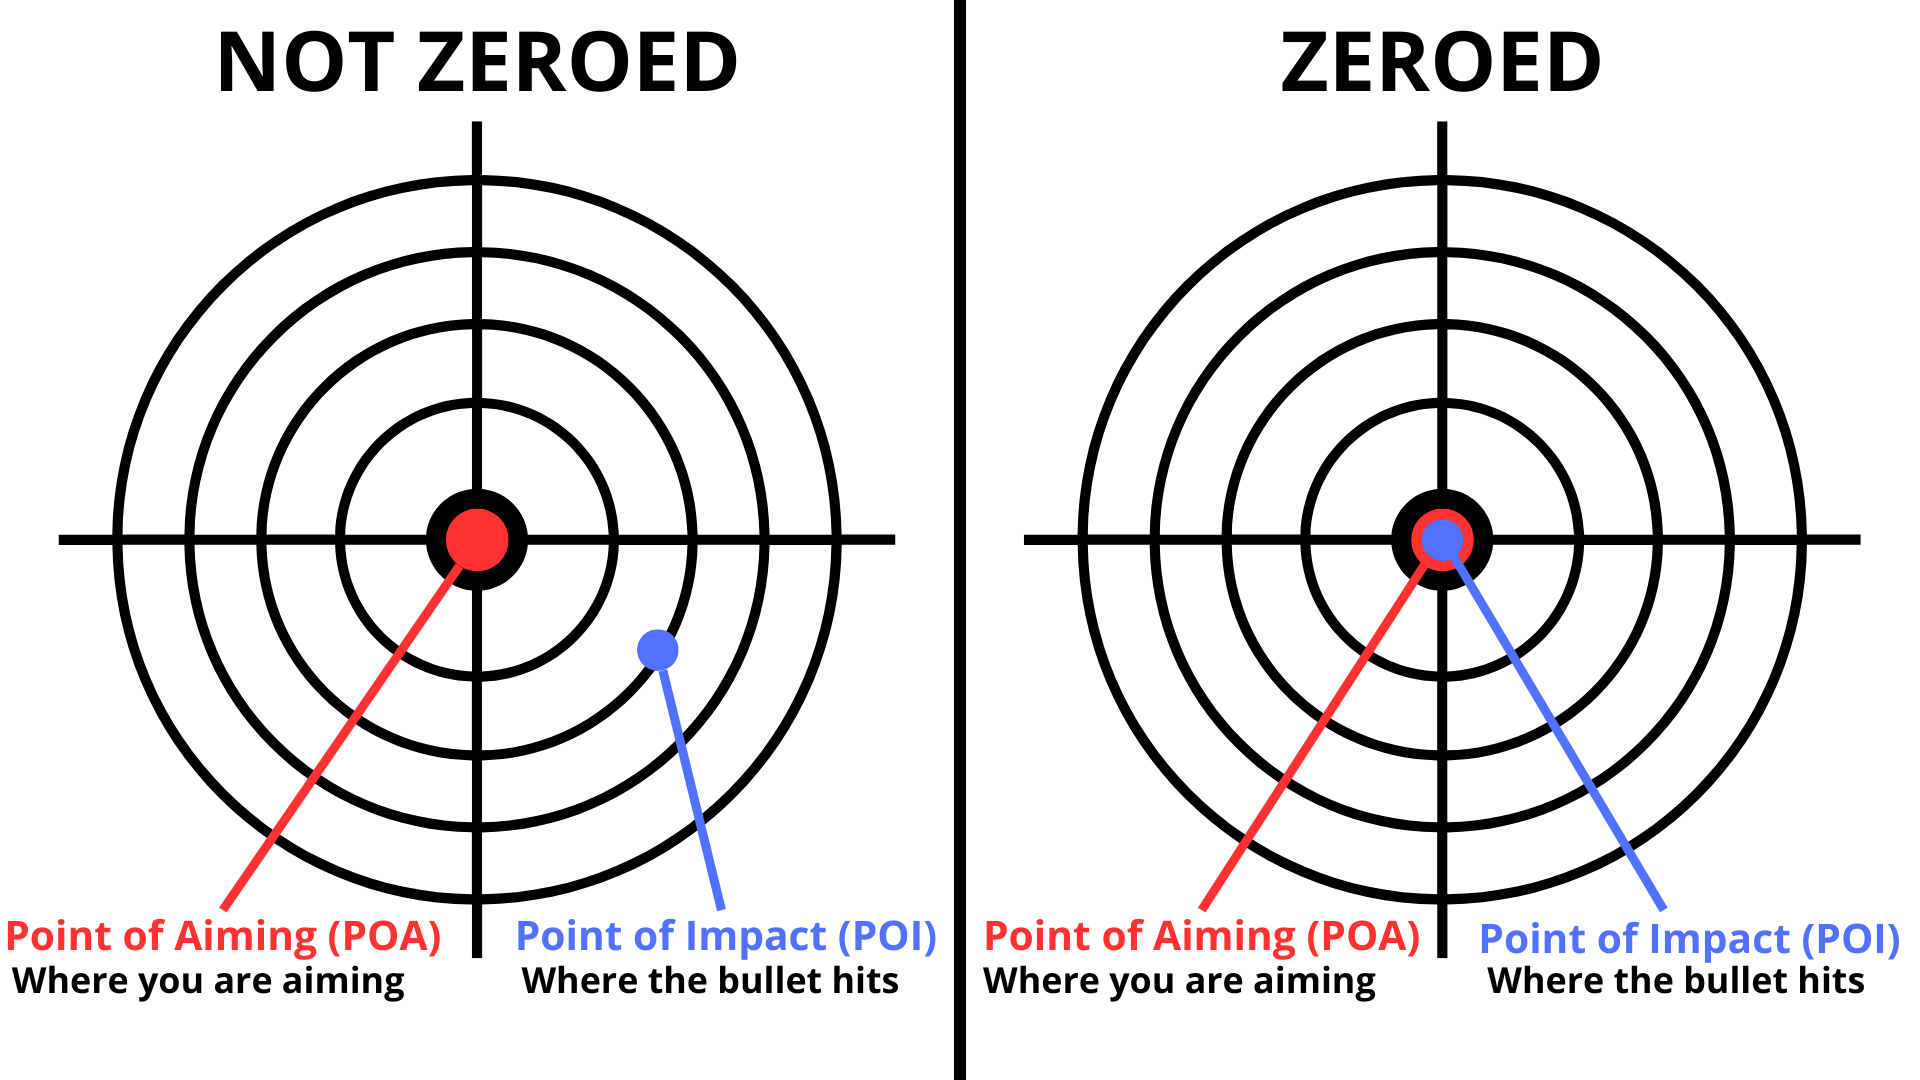
“Zeroing a scope” might sound complex, but it’s simply getting your aiming and shooting to match up perfectly. Imagine you’re aiming at a target through your scope, and when you shoot, the bullet goes exactly where you want it to.
That’s what zeroing a scope is all about – making sure your aiming and shooting work together so you hit your target every time.
It’s like tuning a musical instrument to play the right notes; you’re tuning your scope to shoot accurately.
How to Zero a Scope
Step 1: Gather Your Equipment
Before you learn how to zero a scope, ensure you have all the necessary gear ready. First and foremost, you’ll need your firearm equipped with the scope you intend to zero, obviously. Make sure the scope is securely mounted to prevent any movement during the zeroing process.
Choose the type of ammunition you plan to use regularly, as different bullet weights and types can impact your point of impact.
To steady your shots and eliminate the effects of shaky hands, have a stable shooting rest or sandbags set up. This will provide a consistent shooting platform.
Additionally, having a spotting scope or binoculars on hand will allow you to clearly see your target and make accurate assessments of your shots. This can be helpful when learning how to zero a scope.
Step 2: Choose Your Zeroing Distance
Selecting the right distance to zero your scope is crucial. The commonly chosen distance for zeroing is 100 yards due to its balance between close and long-range shooting scenarios.
However, depending on your shooting preferences and the type of firearm, you might opt for a different distance. Just make sure that the shooting range is safe, well-maintained, and allows you to shoot at your chosen distance.
Step 3: Preliminary Shots
Start by firing a few shots at your target without making any scope adjustments. This will help you get an initial sense of where your shots are landing in relation to your point of aim.
Don’t worry too much about accuracy at this stage; the goal is to establish a baseline for adjustments.
Step 4: Adjust Windage and Elevation
Your scope’s windage and elevation turrets are your tools for getting your shots on target. Consult your scope’s manual to understand the direction and units of adjustment per turret click.
Based on the impact of your preliminary shots, determine whether your shots are hitting too high, low, left, or right.
Begin making adjustments using the turrets in small increments. For example, if your shots are consistently hitting to the right of the target, you’ll want to adjust windage to the left.
Fire a shot or two after each adjustment and carefully observe the change in impact. Gradually fine-tune your adjustments until your shots are consistently centered on the target.
Step 5: Fine-Tuning
Now that you’re getting closer to the bullseye, it’s time for fine-tuning. Make very small adjustments to your windage and elevation settings. Even a slight overcorrection can impact your shot placement, so exercise patience and make minute changes.
Continue firing shots and adjusting until your shots are consistently hitting the center of the target.
Step 6: Confirm and Record
To solidify your zero, fire a group of shots (typically 3-5) to ensure consistency. This accounts for any potential shooter error or slight variations.
Once you’re confident that your shots are consistently landing where you aim, make sure to record your final windage and elevation settings.
This recorded data will be invaluable if you ever need to reset your zero due to environmental changes or different ammunition.
Step 7: Test at Different Ranges
While you’ve zeroed your scope at your chosen distance, don’t stop there. To truly understand your firearm’s ballistic performance, test it at varying distances. This will provide insight into how the bullet trajectory changes as you move farther from your zeroing distance.
This is an excellent way to enhance your shooting skills and adapt to different scenarios.
Conclusion
Zeroing a scope is a foundational skill that every shooter should master. By gathering the right equipment, following a systematic process, and exercising patience, you can achieve consistent and accurate shot placement.
Whether you’re a hunter, competitive shooter, or simply enjoy target practice, knowing how to zero your scope effectively will significantly improve your shooting experience and success.
Happy hunting!